I also shopped the two stages side by side, so I could see the difference:

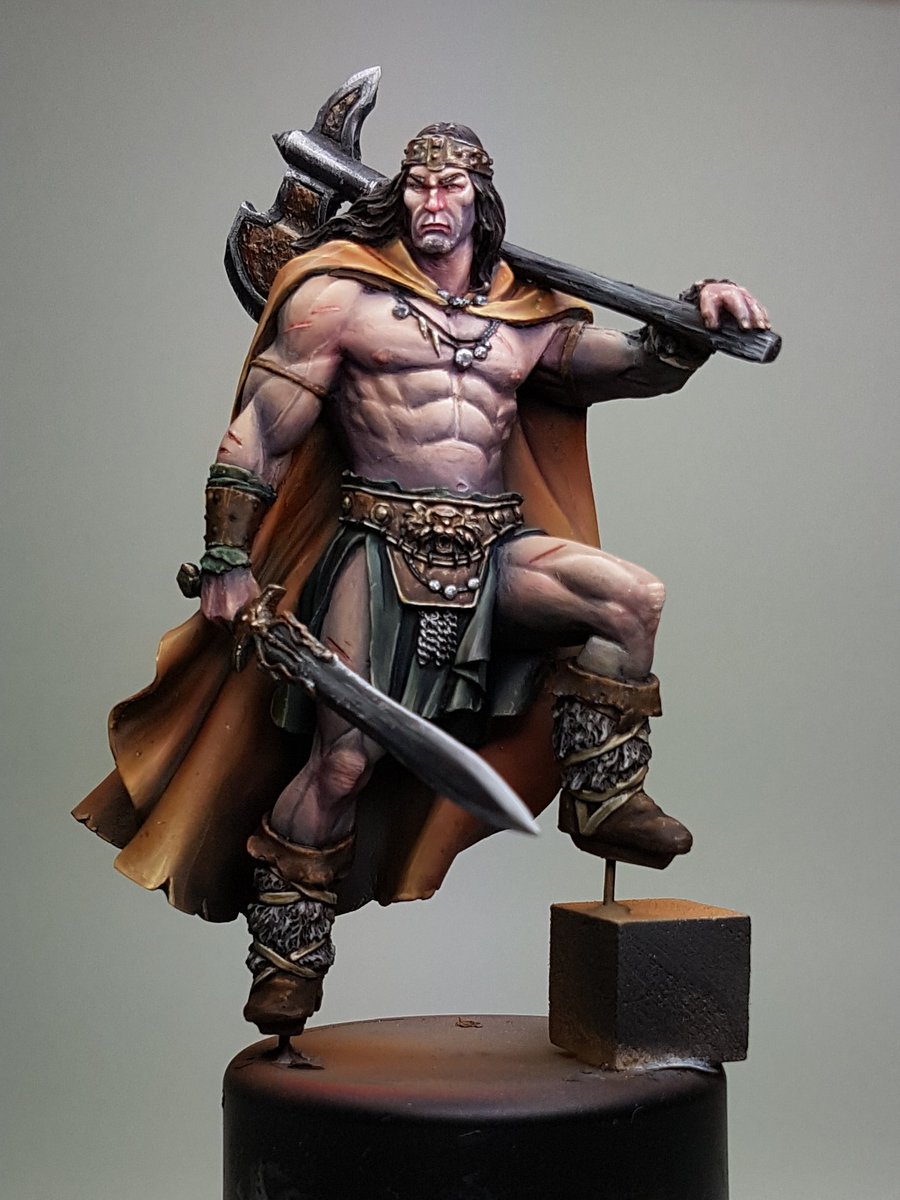
Looking critically at the two models, I definitely have more contrast on the model on the right, but the guy on the left looks a little more smooth, and his skin feels a little more alive. The cloak on the right has also lost saturation, gone a little too pale, and I think the hair is far too white. The boots I like the subtle darker shift, driving that intensity up.
Overally I think the guy on the left looks a little more like he is standing in the sun, the other guy like he is standing in the shade. One thing to keep in mind, the lighting is possibly impacting on these images as well.
Based on that issue with the skin looking a little less soft and smooth, I decided to do a few glazes to try and soften everything out. This is ultra dilute, moreso than I would normally do, because I want to keep most of the contrast, but just smooth it all out. I panzer puttied everything but the skin, and went to town!

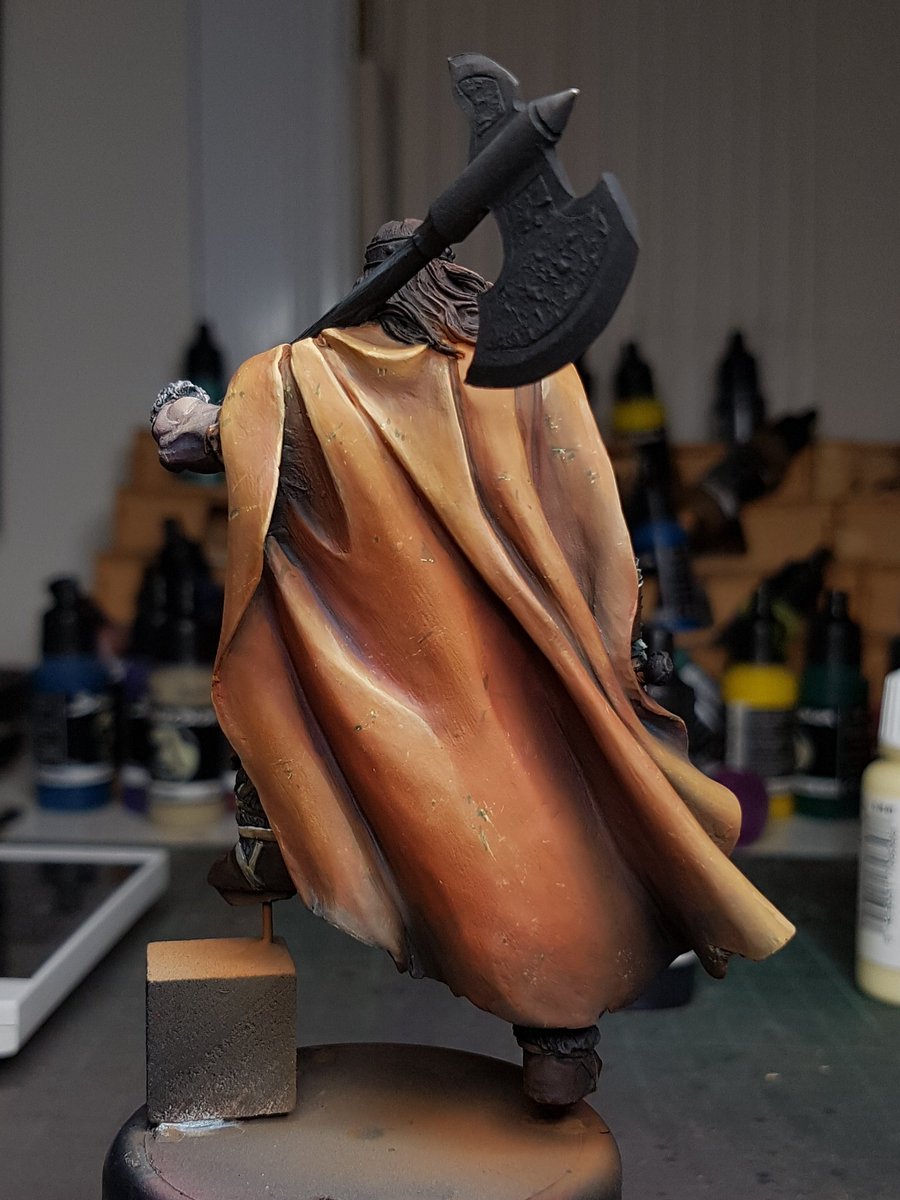
I was much happier with the skin after that, and decided to go a bit more glazing as well. I pulled the putty off I pulled out some oranges and reds, and hit areas of the cloak with some red, to increase saturation, and some oranges to smooth out some of that harshness. I was happy with it, so I did a bit more work to the hair, and painted in some base tones for the metallics.


You can really see the extra red and orange I've got in there now, and I think it brings it all together a lot more. I wasn't worried about bleed over into other areas, as it was a pretty dilute mixture and I was pushing it out at a low PSI. I figured it would just help transitions. One other thing I did was almost 0 PSI, with a medium amount of dilution in my paint, and sprayed on the cloak. It creates a spattering effect, giving a random spread. It is next to impossible to paint random. I called the cloak done.
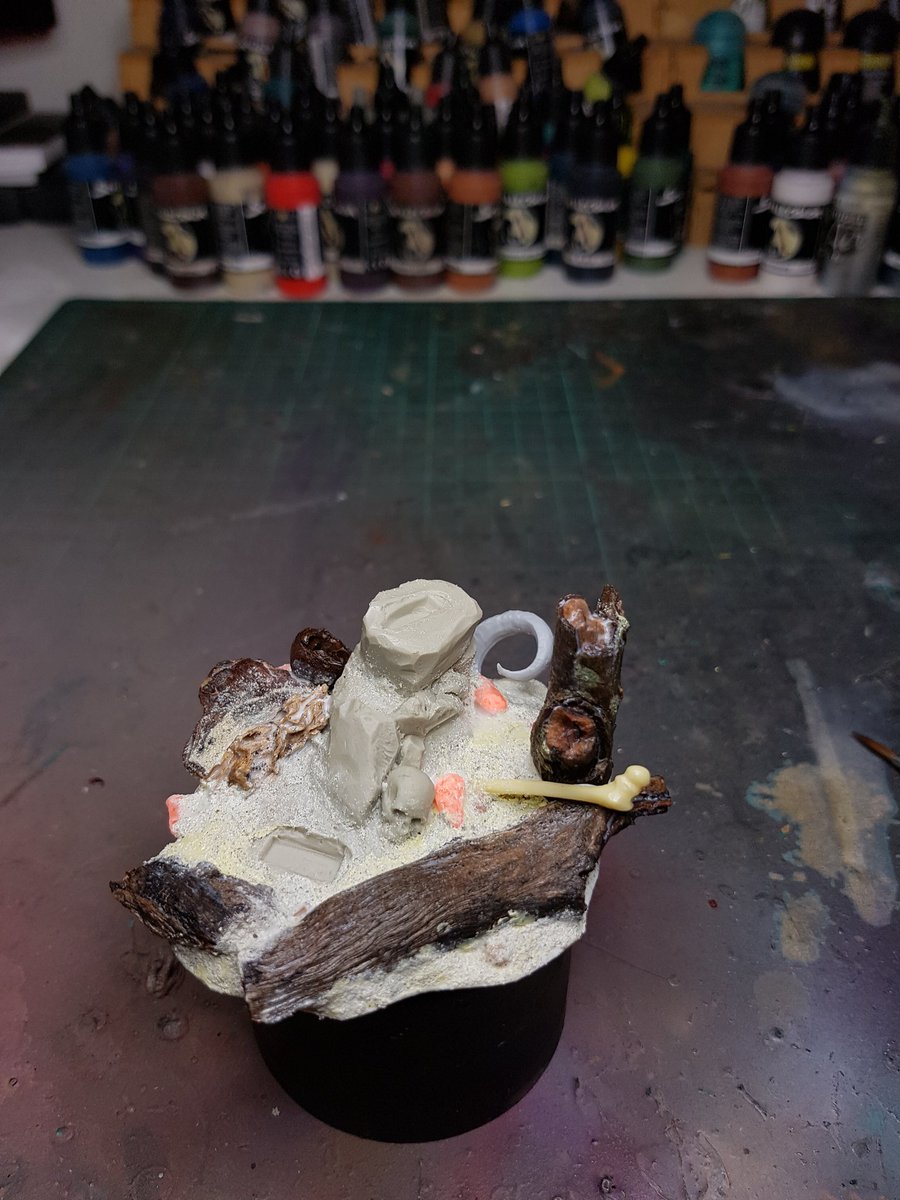
I began work on the base, I have a lovely wooden plinth that I am going to use for this guy, and I didn't want to risk getting any sand or paint on the plinth, so this is a plasticard base to use as the surface for everything. I've glued the original rock structure that comes with Conan in the centre, and added various bits of forest and debris to the surrounding areas. I think it is pretty clear with this model that I've gone for a very autumnal scheme, and so the forest will be a lot of soft oranges, leaves and debris.

I painted on the textured paint, and sandy paste onto the base to cover off some of the milliput, and add some texturing to the stones and other areas. I also added a horn from a beast man bust that I had spare, as a rams horn or something. And with that, left it to dry overnight!
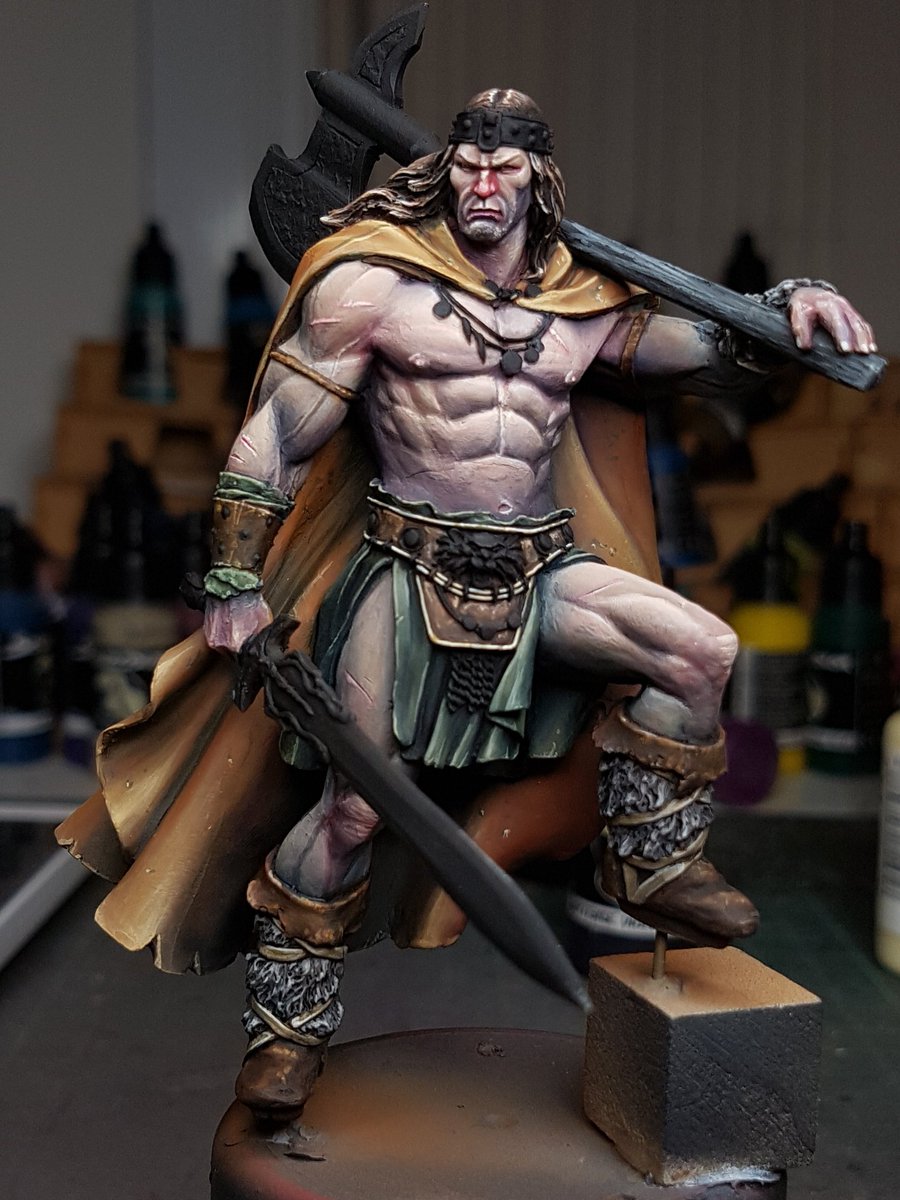
Going back to Conan, I was happy with most of the areas, but I wanted to improve the face a little bit, paint in the eyebrows, and fix up the cords and other bits that were left to do. I also put a little blue back into his green areas, as they felt a little too monotone. I then painted in the crown, the sword and axe and belt. I used a brass colour for some parts, and steel for the others. I tried to put some oxidising on the brass with a little blue, but it was a little overpowering so I went back in a worked with it a bit. I tried to keep the steel areas very dark, with some cold blues in them. I painted gloss on the eyes, Tamiya X27 on the cuts on his body, and a bit in his mouth, and put him up on a proper background to get a really good photo so I could look at it closely.
Overall, I am pretty pleased with it. I have a few areas I want to fix, the axe, the leather gauntlet on his right arm and a maybe a few areas need some blacklining (or in this case it will be brown lining).
Once I paint the base, I think this will be one of my best models yet! It's been a good few weeks for my in terms of my ability levelling up I think.
No comments:
Post a Comment